【CentOS6】インストール後に設定しておきたいこと
今更感溢れるCentOS6系の設定について
環境
- OS: CentOS 6.7
前提
- OSを最小構成にてインストールしていること
ネットワークインターフェースの自動起動
デフォルトの設定ではネットワークインターフェースが自動的に起動しないようになっている
自動起動するためには以下のファイルを書き換える
/etc/sysconfig/network-scripts/ifcfg-eth0
ONBOOT=yes # noをyesに変更
キーボード
インストール時ににキーボードの設定を誤ってしまったなど、キーボードの設定を変更したい場合、以下のファイルを書き換えると変更できる
/etc/sysconfig/keyboard
例)日本語配列にしたい場合の設定
KEYTABLE="jp106"
MODEL="jp106"
LAYOUT="jp"
KEYBOARDTYPE="pc"
参考:CentOSでキーボード設定が日本語じゃないときの対処法: m6 BLOG
システム時刻
# ntpdateのインストール
$ yum install ntpdate
読み込んだプラグイン:fastestmirror
インストール処理の設定をしています
#〜〜〜〜〜〜〜〜〜〜〜中略〜〜〜〜〜〜〜〜〜〜〜〜〜〜〜〜
インストール:
  ntpdate.x86_64 0:4.2.6p5-5.el6.centos.4

完了しました!
# システム時刻の設定
$ ntpdate ntp.nict.jp
15 Feb 03:18:47 ntpdate[2539]: step time server 133.243.238.244 offset 471.270285 sec
# 確認
$ date
2016年  2月 15日 月曜日 03:18:50 JST
# ついでにハードウェアクロックも修正
# システムクロックの時刻をハードウェアクロックに反映
$ hwclock -w
# 確認
$ hwclock -r
2016年02月15日 03時19分28秒  -0.609921 秒
cronで定期実行する場合(下記の例は毎月1日の0:00に実行)
0 0 1 * * /usr/sbin/ntpdate ntp.nict.jp > /dev/null 2>&1
0 0 1 * * /sbin/hwclock -w > /dev/null 2>&1
MeteorやっててClient IDの取得でハマった
環境
Meteor: 1.2.1
前提
Googleアカウントを持っていること
accounts-googleの実装
MeteorでGoogleのOAuthによるログインを実装するのはすごく簡単で、
以下の通りパッケージを追加して、コードを一行差し込むだけでできてしまう。
パッケージ追加
meteor add accounts-google accounts-ui
sample.html
<head>
  <title>test-meteor-pja</title>
</head>

<body>
  <h1>Welcome to Meteor!</h1>

  {{> loginButtons}}  <!-- add -->

  {{> hello}}
</body>

<template name="hello">
  <button>Click Me</button>
  <p>You've pressed the button {{counter}} times.</p>
</template>
アクセスするとご覧の通り
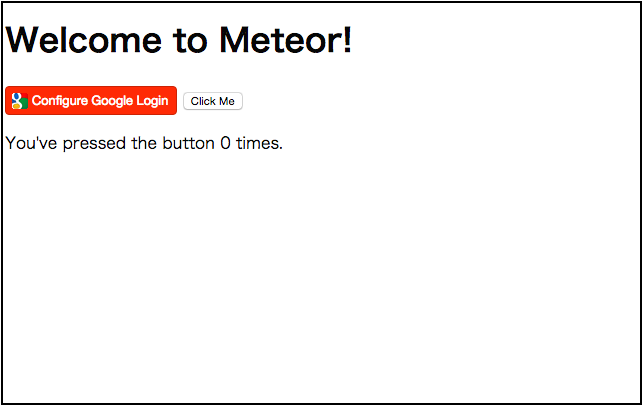
ただ、client IDの登録でハマります。
私のようなイングリッシュがプアな人間は特に。
ログインボタンを実装後、クリックするとClient IDの登録手順が示されるんですが、これが古いもののためのなのか、書いてあることと実際の画面が全然異なるのである。
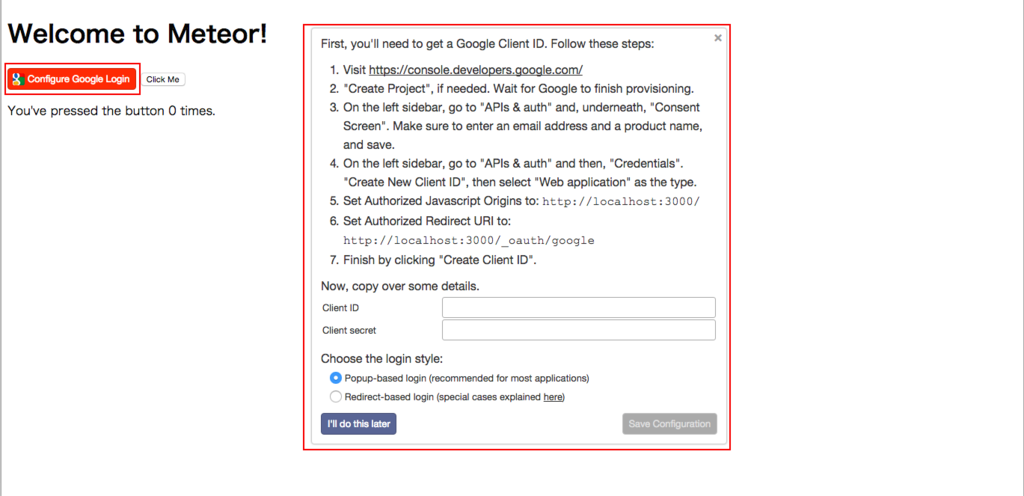
というわけで、OAuth認証ができるようになるまでを説明していく。
1. Google Developers Consoleへアクセス
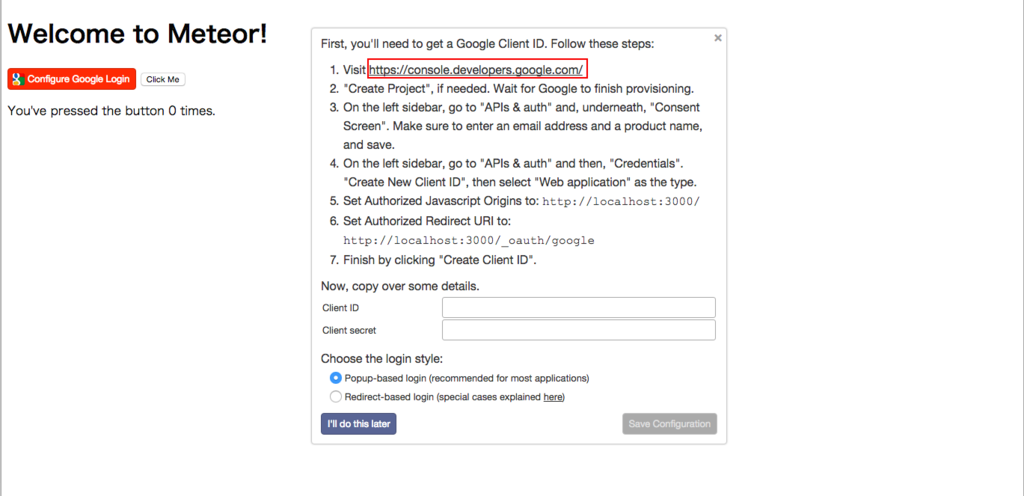
まずは「Google Developers Console」にアクセスする
https://console.developers.google.com/
2. プロジェクトの作成
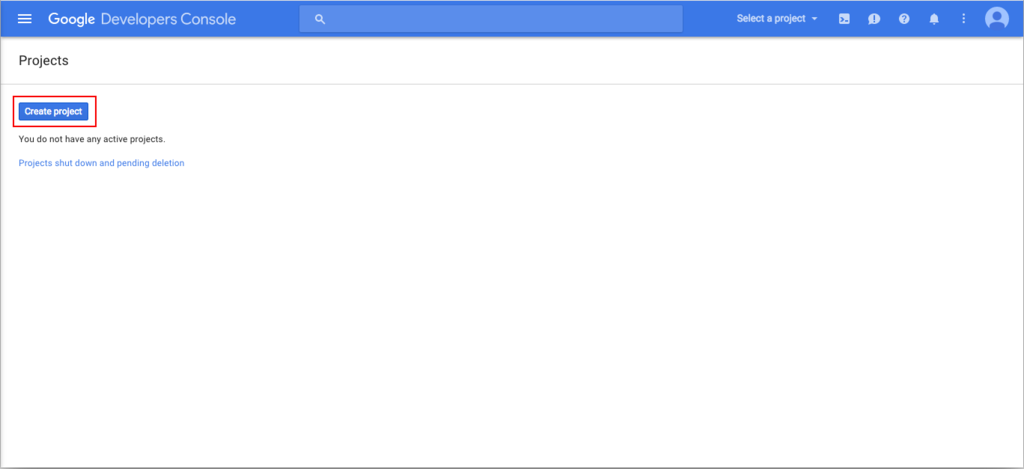
はじめてGoogle Developers Consoleを利用する人はプロジェクトがないはずなので「Create project」からプロジェクトを作成する
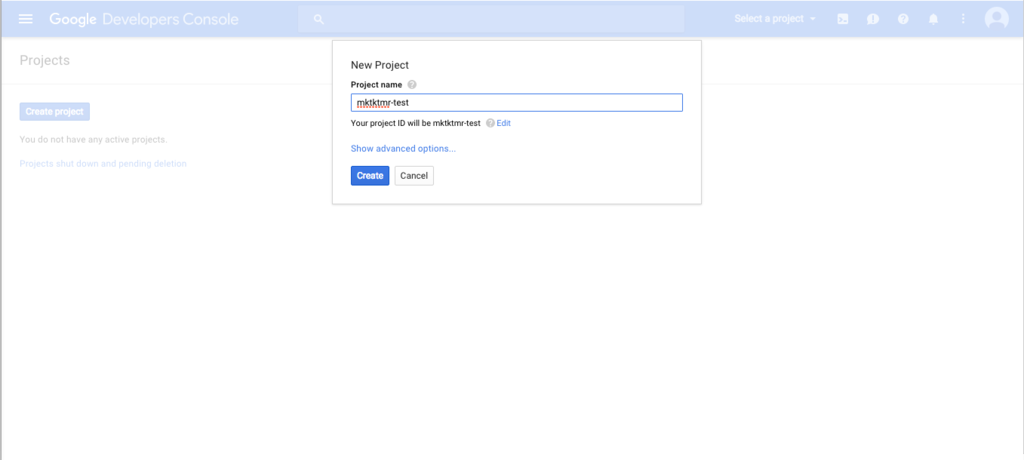
3. OAuth consentの設定
プロジェクトが作成できたら、ダッシュボードがひらくので、 左上にあるハンバーガーアイコンをクリックし、メニューを開く
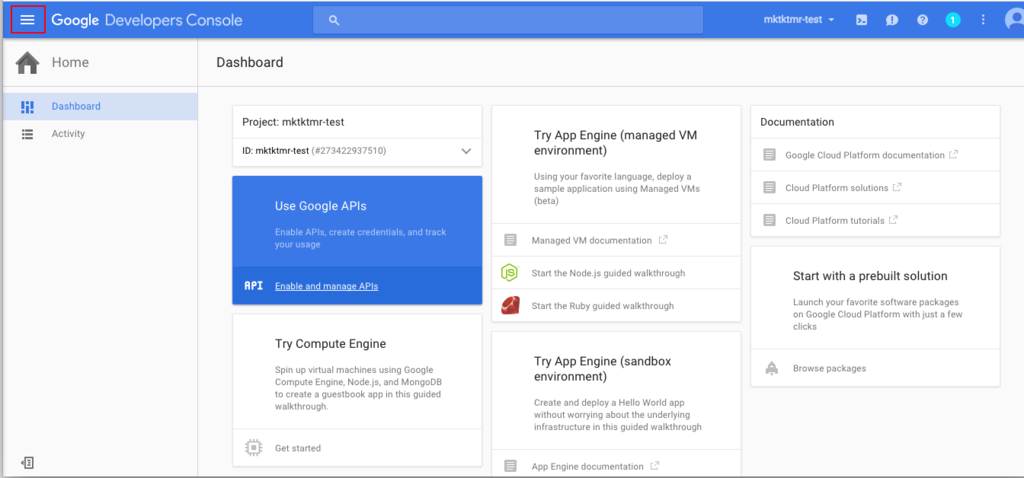
メニューのなかに「API Manager」という項目があるので選択する
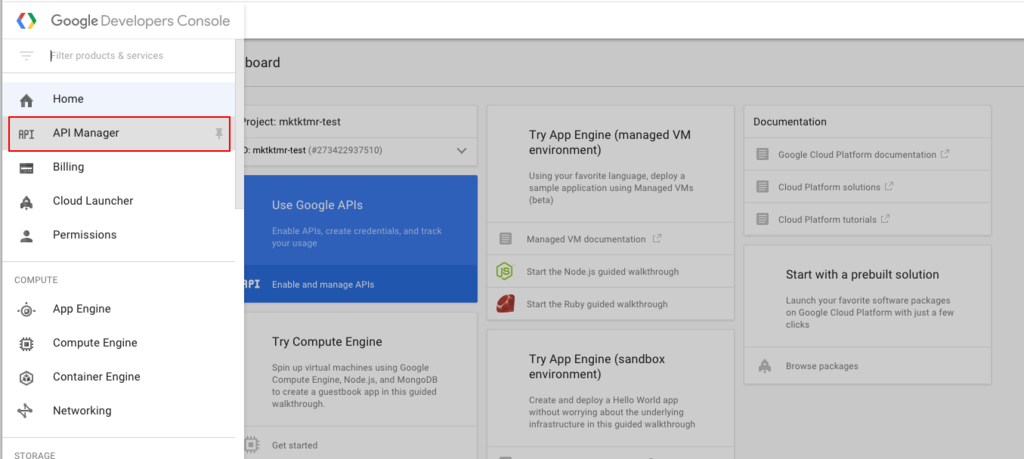
API Managerページのメニューのなかに「Credentials」があるので選択し、開かれたページのタブのなかの「OAuth consent screen」を選択する
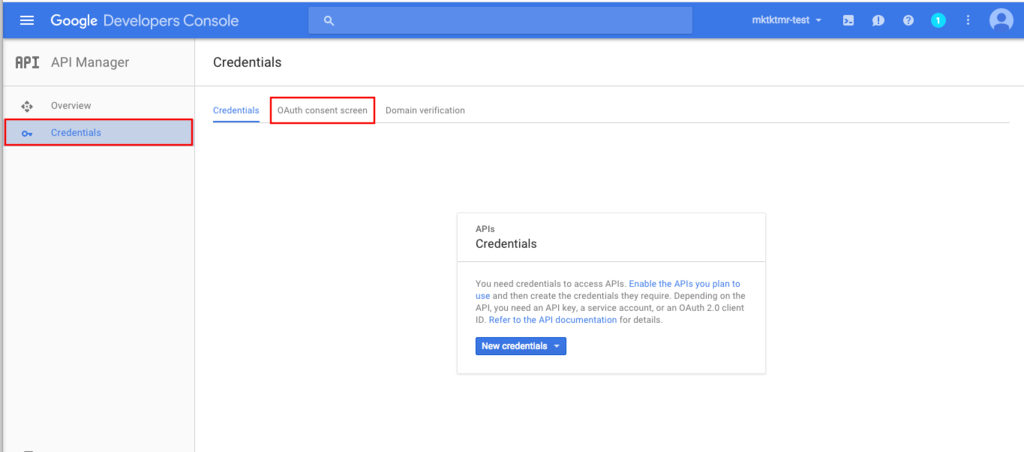
メールアドレスとProduct nameを入力し、「save」ボタンをクリック

4. Credentialの作成
次に「Credentials」タブを選択し、「New Credentials」ボタンを押下する
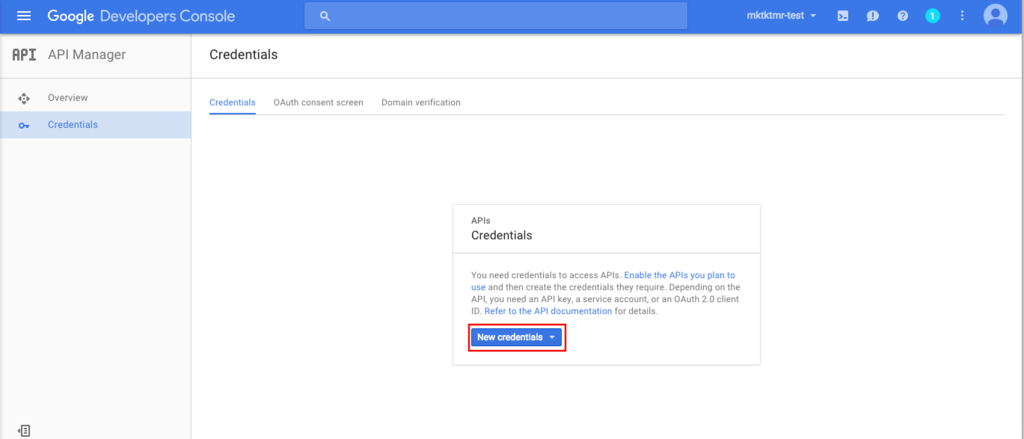
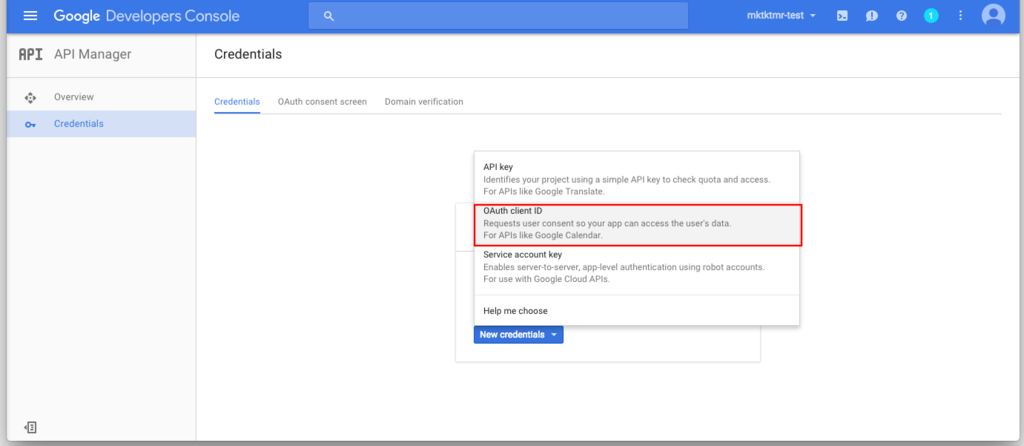
すると、プルダウンが開き、そのなかに「OAuth Client ID」があるので選択する。
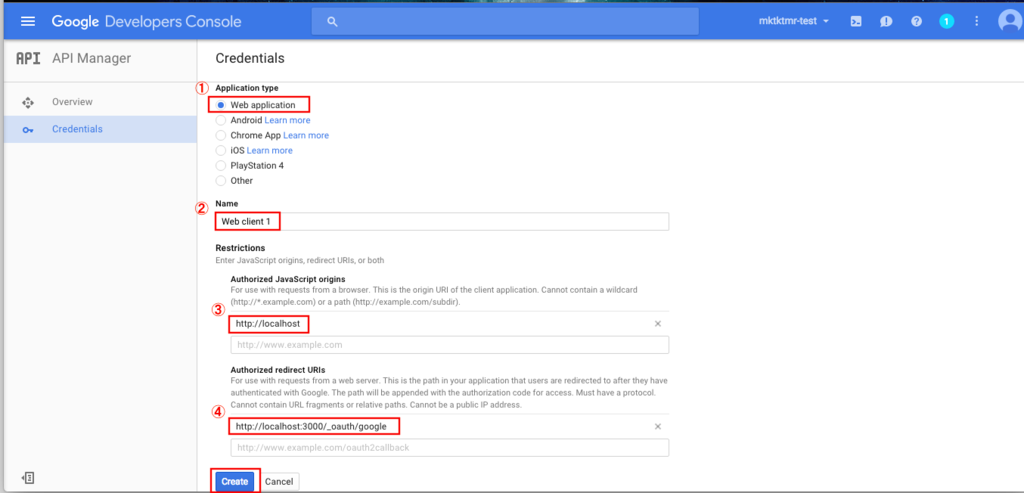
Application type
Web applicationを選択Name
任意の名前を入力Authorized JavaScript origins
http://localhost:3000Authorized redirect URIs
http://localhost:3000/_oauth/google
以上を入力し、「Create」ボタンをクリック
すると「client ID」と「client secret」が発行される
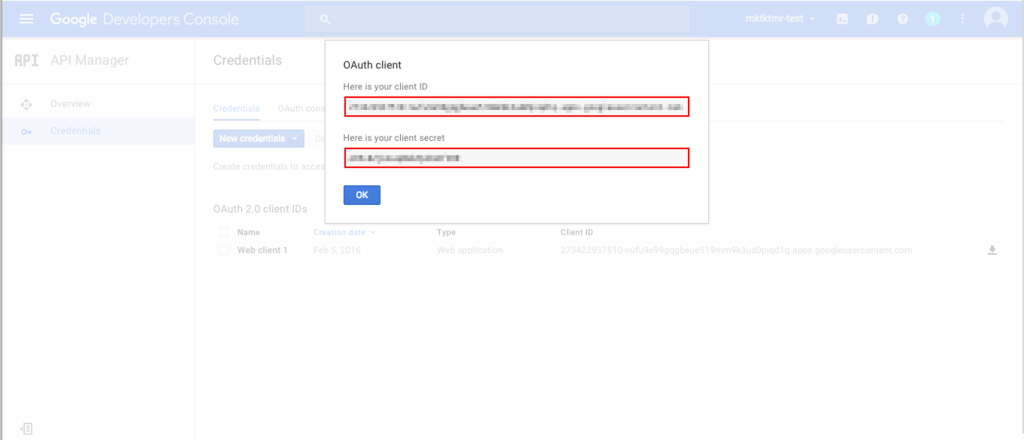
5. 「client ID」および「client secret」の登録
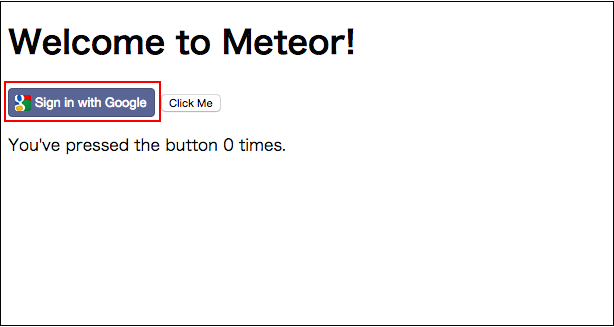
手順4で発行された「client ID」および「client secret」をMeteorアプリケーションのOAuth設定のフォームに入力し、「Save Configration」をクリックする
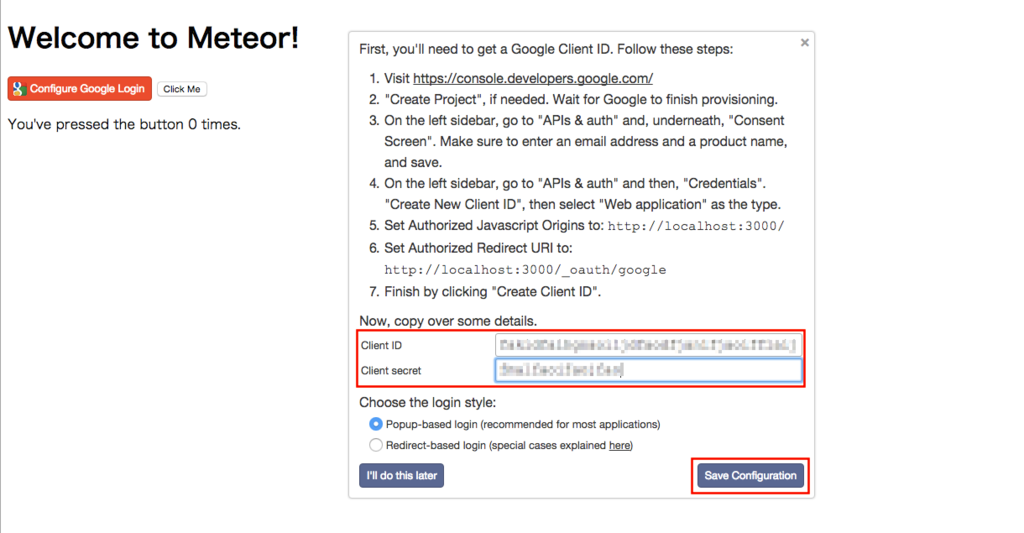
↓のようになればおk
【React】とりあえず環境
Reactを弄る環境を整えてみる
環境
- OS: OS X 10.10.5
- React: 0.14.7
- npm: 3.3.12
前提
- npmがインストールされていること
参考
npmを使った方法
CommonJSのモジュールシステムとして「browserify」と「webpack」を使う方法があるが、今回はbrowserifyを利用する
※「browserify」とは
browserify をはじめてみる - Please Sleep
CommonJS のモジュールの仕組み、つまり Node.js の require をブラウザ上でも使えるようにするもの、ということでいいみたい。
公式:Browserify
browserifyのインストール
$ sudo npm install -g browserify
Password:
/usr/local/bin/browserify -> /usr/local/lib/node_modules/browserify/bin/cmd.js
/usr/local/lib
└─┬ browserify@13.0.0
  ├── assert@1.3.0
#〜〜〜〜〜〜〜〜〜〜〜〜〜〜〜〜〜〜〜〜〜中略〜〜〜〜〜〜〜〜〜〜〜〜〜〜〜〜〜〜〜〜〜〜〜〜〜〜〜〜〜〜
  ├─┬ vm-browserify@0.0.4
  │ └── indexof@0.0.1
  └── xtend@4.0.1
Reactのインストール
$ npm install --save react react-dom babelify babel-preset-react
npm WARN saveError ENOENT: no such file or directory, open '/path/package.json'
/path/Using_React_from_npm
├─┬ babel-preset-react@6.3.13
│ ├─┬ babel-plugin-syntax-flow@6.3.13
#〜〜〜〜〜〜〜〜〜〜〜〜〜〜〜〜〜〜〜〜〜中略〜〜〜〜〜〜〜〜〜〜〜〜〜〜〜〜〜〜〜〜〜〜〜〜〜〜〜〜〜〜
│   └── whatwg-fetch@0.9.0
└── react-dom@0.14.7

npm WARN ENOENT ENOENT: no such file or directory, open '/path/Using_React_from_npm/package.json'
npm WARN EPACKAGEJSON Using_React_from_npm No description
npm WARN EPACKAGEJSON Using_React_from_npm No repository field.
npm WARN EPACKAGEJSON Using_React_from_npm No README data
npm WARN EPACKAGEJSON Using_React_from_npm No license field.
ワーニングは後で調べます。。。
サンプルソース
サンプルソースとして以下を用意する
helloworld.html
<!DOCTYPE html>
<html>
  <head>
    <meta charset="UTF-8" />
    <title>Hello React!</title>
  </head>
  <body>
    <div id="example"></div>
    <script src="bundle.js"></script>
  </body>
</html>
main.js
var React = require('react');
var ReactDOM = require('react-dom');

ReactDOM.render(
  <h1>Hello, world!</h1>,
  document.getElementById('example')
);
トランスパイル
main.jsをbundle.jsとしてトランスパイルする
$ browserify -t [ babelify --presets [ react ] ] main.js -o bundle.js
HTMLファイルを開いてみると
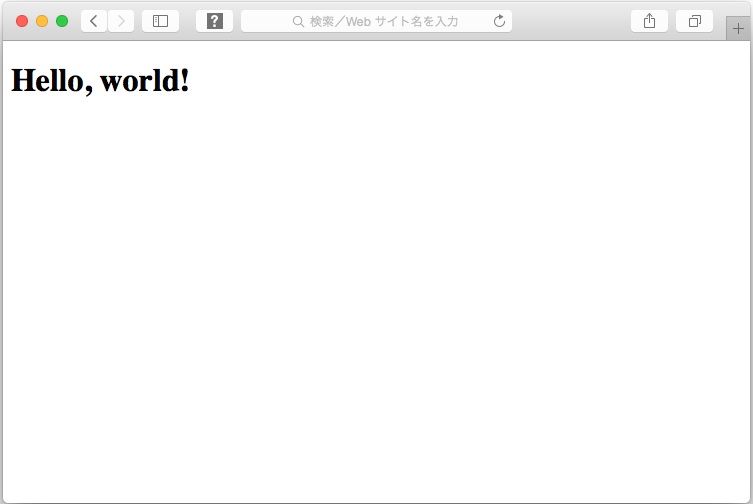
ちなみに最終的なディレクトリ構成以下です
Root/
├ bundle.js
├ helloworld.html
├ main.js
└ node_modules/
Error
ちょっとハマりました。。。
当初HTMLを以下のように書いていて
<!DOCTYPE html>
<html>
  <head>
    <meta charset="UTF-8" />
    <title>Hello React!</title>
  </head>
  <body>
    <div id="example"></div>
    <script src="bundle.js"></script>
  </body>
</html>
↓こんなエラー出てました。。。
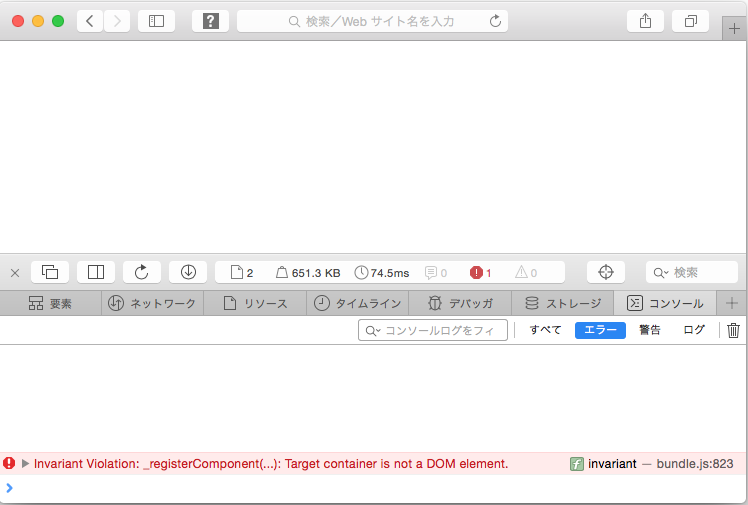
Invariant Violation: _registerComponent(...): Target container is not a DOM element.
invariantbundle.js:908
_registerComponentbundle.js:13104:165
_renderNewRootComponentbundle.js:13126
ReactMount__renderNewRootComponentbundle.js:14476
_renderSubtreeIntoContainerbundle.js:13206
renderbundle.js:13226
React_renderbundle.js:14476
(anonymous 関数)bundle.js:34
sbundle.js:16
ebundle.js:25
(anonymous 関数)bundle.js:27
上記のコードだと、スクリプトが読まれた時点では、バインドしたいDOMが生成されていなため、エラーをこいてしまうってことだと思う。
スクリプトを読み込む位置を変えずに、
<script async src="bundle.js"></script> <!-- add async -->
でもいけるが、スクリプトを読み込む位置を変える方がベターらしい
starter kitを使った方法
starter kitを利用するとnpmなしでもReactをできるよ!とのことでこちらも試してみる
starter kitのダウンロード
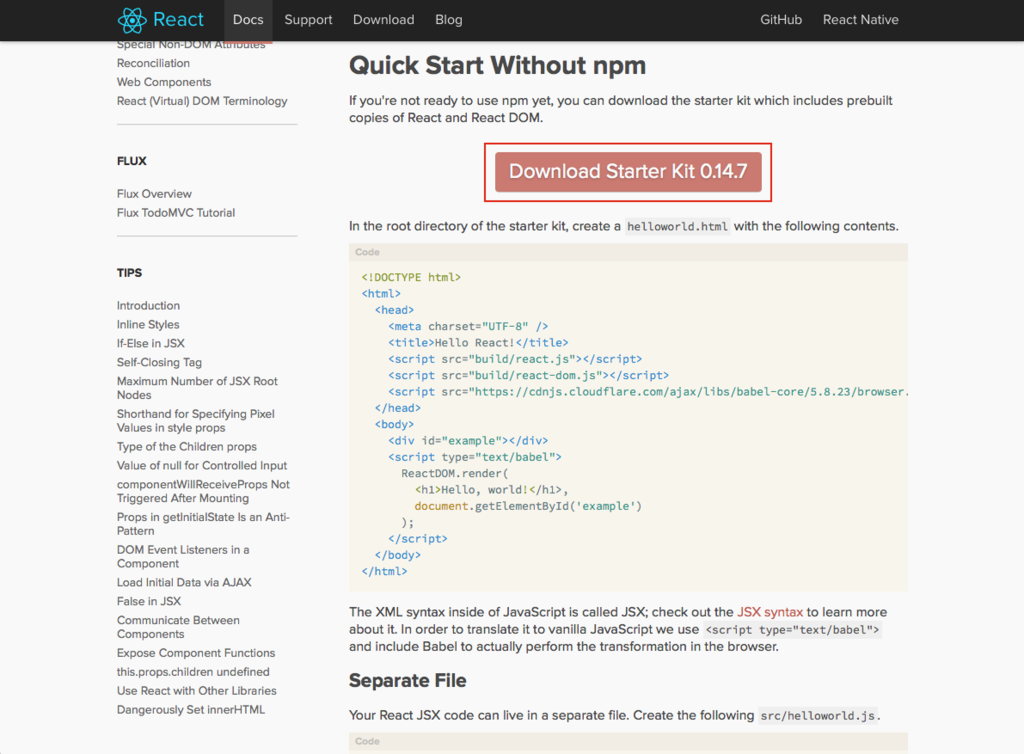
とりあえずHTMLに直書きでReactのコードを差し込む
以下HTMLファイルをダウンロードしてきたディレクトリ配下に置く
react-0.14.7/
┣ README.md
┣ build
┣ examples
┗ helloworld.html
helloworld.html
<!DOCTYPE html>
<html>
  <head>
    <meta charset="UTF-8" />
    <title>Hello React!</title>
    <script src="build/react.js"></script>
    <script src="build/react-dom.js"></script>
    <script src="https://cdnjs.cloudflare.com/ajax/libs/babel-core/5.8.23/browser.min.js"></script>
  </head>
  <body>
    <div id="example"></div>
    <script type="text/babel">
      ReactDOM.render(
        <h1>Hello, world!</h1>,
        document.getElementById('example')
      );
    </script>
  </body>
</html>
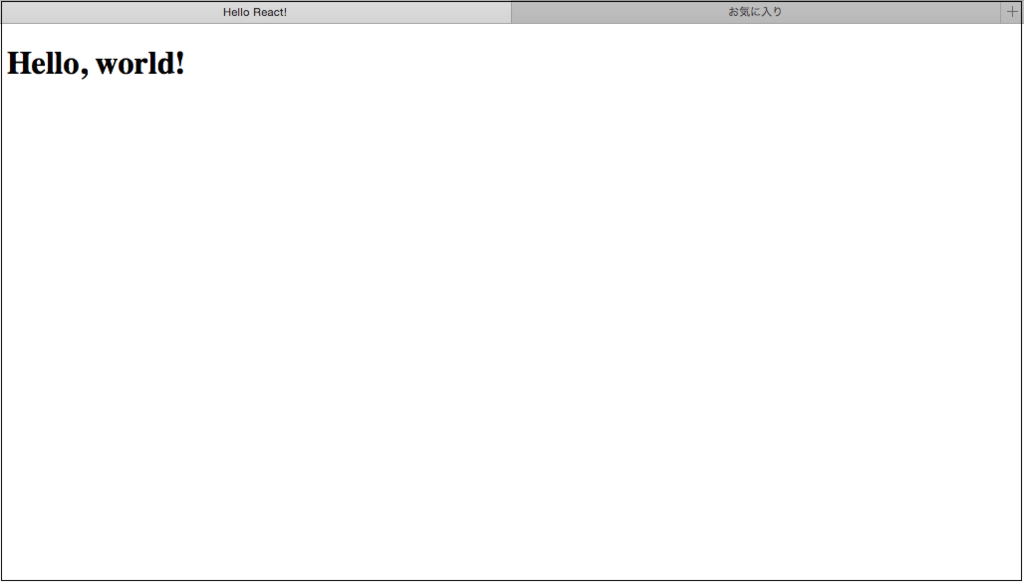
helloworld.htmlを開いてみる
HTMLとjsファイルを分割してみる
以下jsファイルを追加
react-0.14.7/
┣ README.md
┣ build
┣ examples
┣ helloworld.html
┗ src/
┗ helloworld.js
ReactDOM.render(
  <h1>Hello, world!!</h1>,
  document.getElementById('example')
);
上記jsファイルを読み込むようHTMLを修正
<!DOCTYPE html>
<html>
  <head>
    <meta charset="UTF-8" />
    <title>Hello React!</title>
    <script src="build/react.js"></script>
    <script src="build/react-dom.js"></script>
    <script src="https://cdnjs.cloudflare.com/ajax/libs/babel-core/5.8.23/browser.min.js"></script>
  </head>
  <body>
    <div id="example"></div>
    <script type="text/babel" src="src/helloworld.js"></script> <!-- 修正 -->
  </body>
</html>
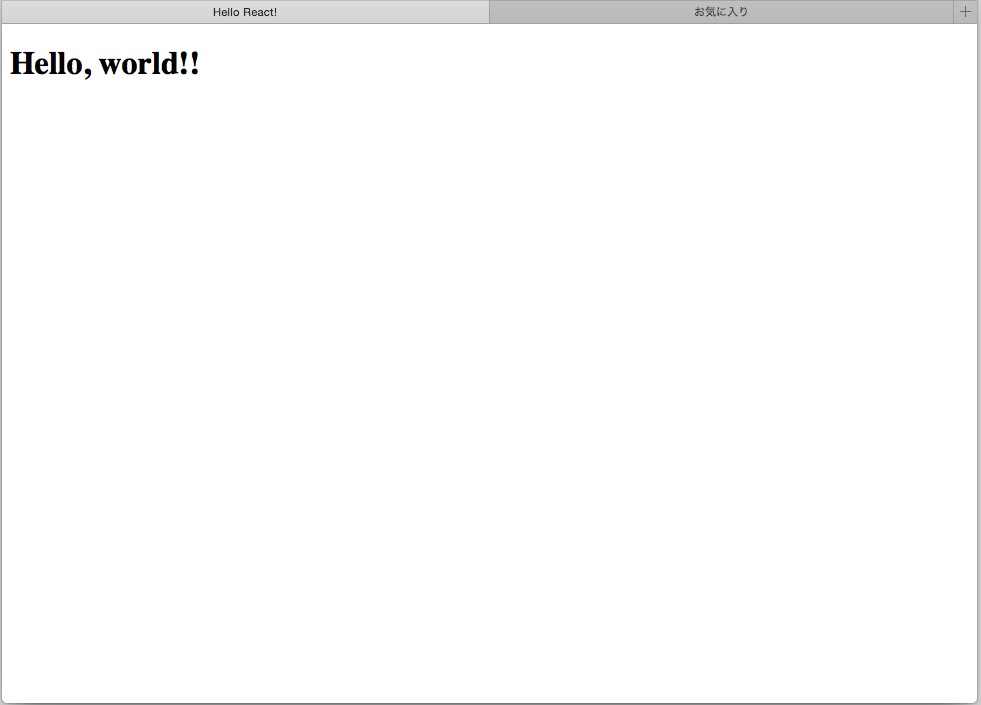
helloworld.htmlを開く
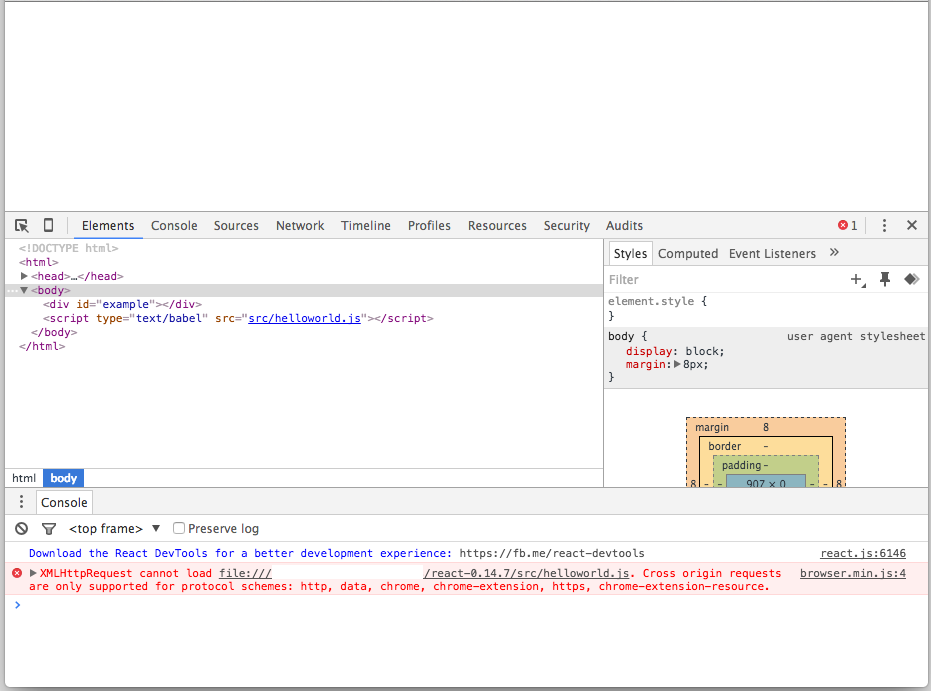
※ちなみに公式の説明にもある通りブラウザによっては直接HTMLファイルを開くとエラーが発生することがある
Note that some browsers (Chrome, e.g.) will fail to load the file unless it's served via HTTP.
Chromeで開くとこんな具合
そんな時はpythonのhttpモジュールを呼ぶと便利(最近知った)
# python -m SimpleHTTPServerと一行叩くだけでhttpseverが起動する。。。
$ python -m SimpleHTTPServer
Serving HTTP on 0.0.0.0 port 8000 ...
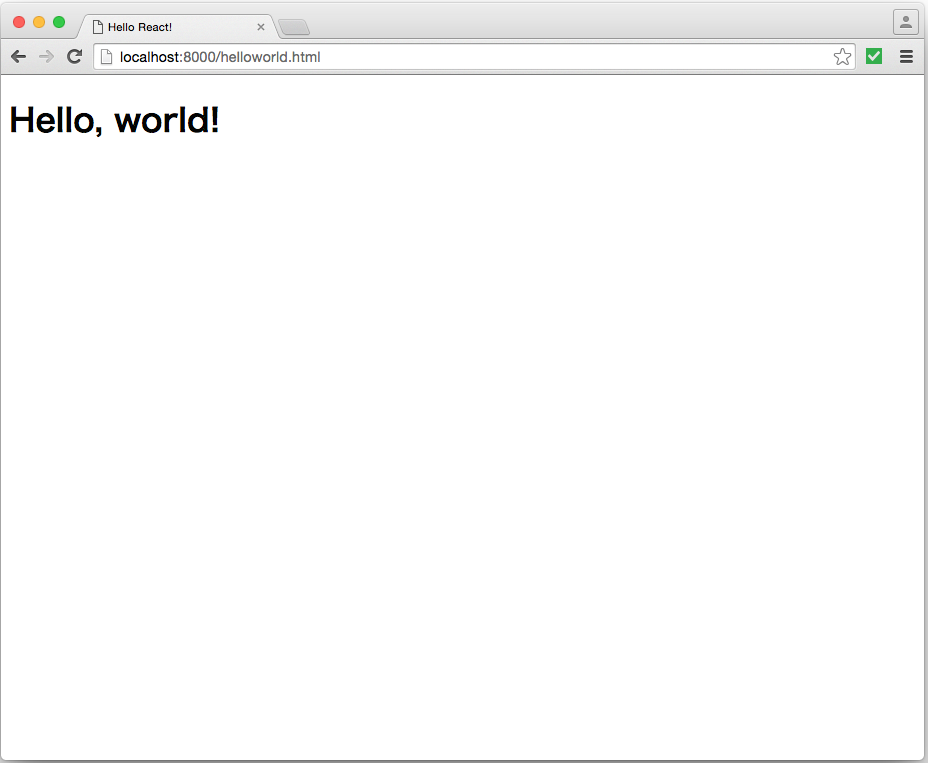
んで、http://localhost:8000/helloworld.htmlにアクセスすると
オフラインでトランスパイル
Babelを利用することで、オフラインでもJavaScriptをトランスパイルできる
※「Babel」とは
Babelで始める!モダンJavaScript開発 | HTML5Experts.jp
ECMAScript2015 (ES6)やECMAScript7などで書かれたソースコードを一般的なブラウザがサポートしているECMAScript5の形式に出力することができます。
とりあえずbabelをインストール
npm install --global babel-cli
npm install babel-preset-react
_人人人人人人人人人人人人人_
> Quick Start Without npm <
 ̄Y^Y^Y^Y^Y^Y^Y^YY^Y^Y^ ̄
なんて銘打っておいてnpm使ってるじゃんっていうツッコミをしたくなるんですが、まあ、置いときます
ソースファイル修正
以下jsファイルを修正
src/helloworld.js
ReactDOM.render(
  React.createElement('h1', null, 'Hello, world!!!'),
  document.getElementById('example')
);
HTMLファイルも修正
src/helloworld.html
<!DOCTYPE html>
<html>
  <head>
    <meta charset="UTF-8" />
    <title>Hello React!</title>
    <script src="build/react.js"></script>
    <script src="build/react-dom.js"></script>
    <!-- No need for Babel! -->
  </head>
  <body>
    <div id="example"></div>
    <script src="build/helloworld.js"></script>
  </body>
</html>
bable発動
# srcディレクトリを監視して、トランスパイルしたファイルをbuildディレクトリに出力する
$ babel --presets react src --watch --out-dir build
src/helloworld.js -> build/helloworld.js
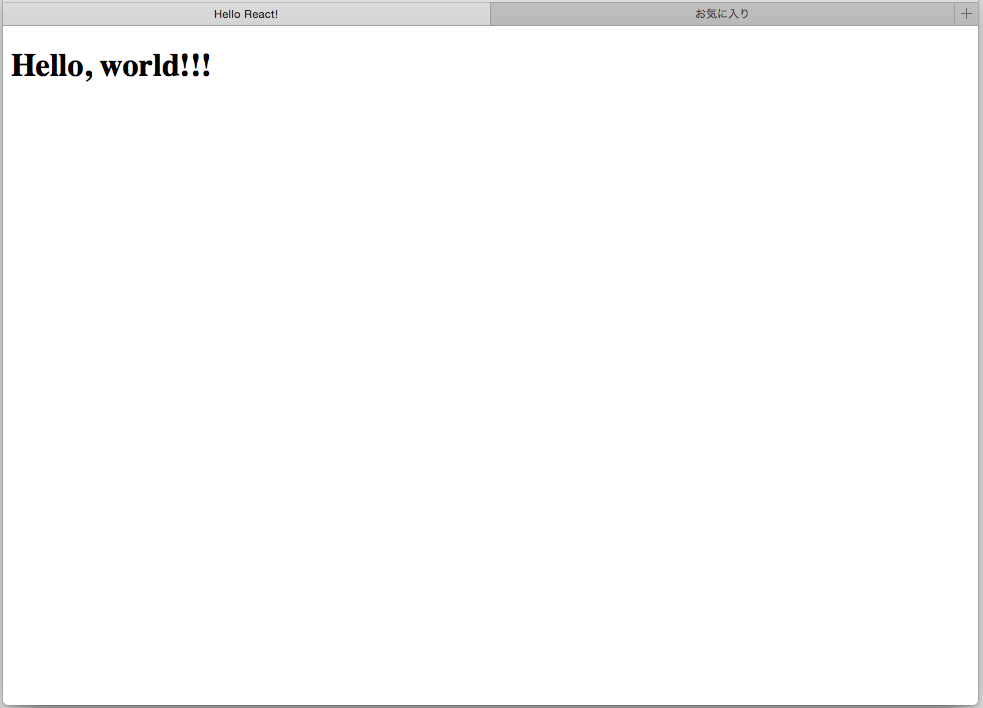
ブラウザでhtmlファイルオープン
こんな感じで色々な方法でReactを利用できる
どれがベスト・ベターな方法なのかはこれから探っていく
個人的にはReactはWebフロントのJavaScriptフレームワークの中で一番注目している
また、WebだけでなくNativeアプリを向けのReact Nativeなんてのも開発中みたいで、これから先も楽しみなフレームワークです
【Heroku】チュートリアル(Node.js)メモ
環境
- OS: OS X 10.10.5
前提
- Heroku Toolbeltがインストールされていること
- node.jsがインストールされていること
デプロイまで
#公式サンプルプロジェクトを利用
$ git clone https://github.com/heroku/node-js-getting-started.git
Cloning into 'node-js-getting-started'...
remote: Counting objects: 442, done.
remote: Total 442 (delta 0), reused 0 (delta 0), pack-reused 442
Receiving objects: 100% (442/442), 224.68 KiB | 119.00 KiB/s, done.
Resolving deltas: 100% (65/65), done.
Checking connectivity... done.
$ cd node-js-getting-started/
#リモートリポジトリの確認
$ git remote
origin #この時点でリモートリポジトリはoriginのみ
$
$
#「heroku create」でheroku上にアプリを作成する
#createの後(例だと’test-heroku-app’)はアプリ名で省略可能
#省略した場合、自動でランダムな名称が付けられる
$ heroku create test-heroku-app
Creating test-heroku-app... !!!
 ▸    Name is already taken
#既に使われてる名前でした。。。
$
#リトライ
$ heroku create mktktmr-test-heroku-app
Creating mktktmr-test-heroku-app... done, stack is cedar-14
https://mktktmr-test-heroku-app.herokuapp.com/ | https://git.heroku.com/mktktmr-test-heroku-app.git
#リモートリポジトリ確認
$ git remote
heroku #「heroku create」をするとリモートリポジトリにherokuが追加される
origin
Herokuダッシュボード(heroku create後)
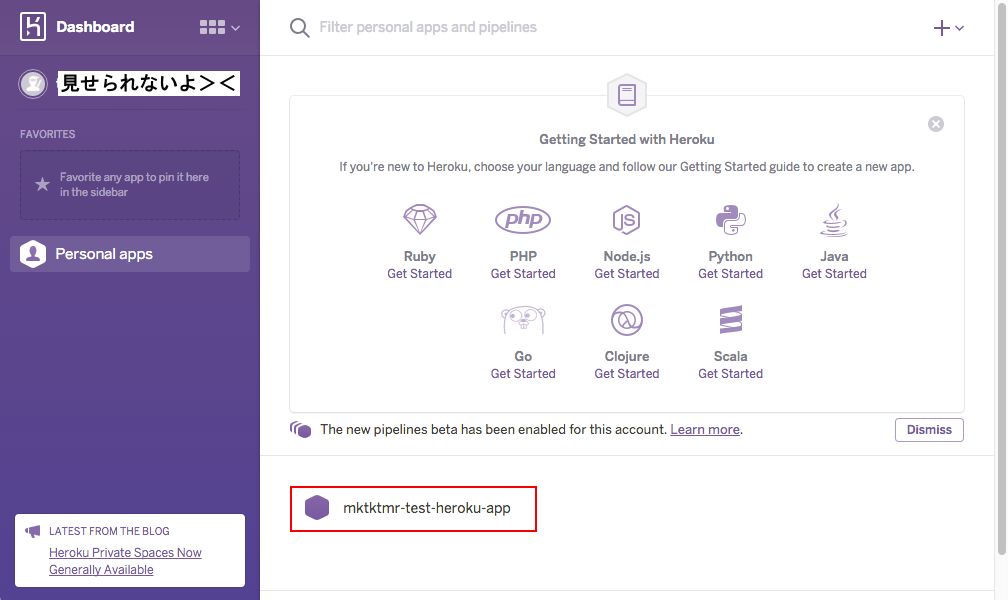
App管理画面

push
#herokuリポジトリにPushすることでデプロイ完了
$ git push heroku master
Counting objects: 433, done.
Delta compression using up to 4 threads.
Compressing objects: 100% (337/337), done.
Writing objects: 100% (433/433), 222.43 KiB | 0 bytes/s, done.
Total 433 (delta 63), reused 433 (delta 63)
remote: Compressing source files... done.
remote: Building source:
remote:
remote: -----> Node.js app detected
remote:
remote: -----> Creating runtime environment
remote:
remote:        NPM_CONFIG_LOGLEVEL=error
remote:        NPM_CONFIG_PRODUCTION=true
remote:        NODE_ENV=production
remote:        NODE_MODULES_CACHE=true
remote:
remote: -----> Installing binaries
remote:        engines.node (package.json):  0.12.7
remote:        engines.npm (package.json):   unspecified (use default)
remote:
remote:        Downloading and installing node 0.12.7...
remote:        Using default npm version: 2.11.3
remote:
remote: -----> Restoring cache
remote:        Skipping cache restore (new runtime signature)
remote:
remote: -----> Building dependencies
remote:        Pruning any extraneous modules
remote:        Installing node modules (package.json)
remote:        ejs@2.3.3 node_modules/ejs
remote:
remote:        express@4.13.3 node_modules/express
remote:        ├── escape-html@1.0.2
remote:        ├── merge-descriptors@1.0.0
remote:        ├── array-flatten@1.1.1
remote:        ├── cookie@0.1.3
remote:        ├── utils-merge@1.0.0
remote:        ├── cookie-signature@1.0.6
remote:        ├── fresh@0.3.0
remote:        ├── methods@1.1.2
remote:        ├── range-parser@1.0.3
remote:        ├── vary@1.0.1
remote:        ├── path-to-regexp@0.1.7
remote:        ├── parseurl@1.3.1
remote:        ├── content-type@1.0.1
remote:        ├── etag@1.7.0
remote:        ├── content-disposition@0.5.0
remote:        ├── depd@1.0.1
remote:        ├── qs@4.0.0
remote:        ├── on-finished@2.3.0 (ee-first@1.1.1)
remote:        ├── finalhandler@0.4.0 (unpipe@1.0.0)
remote:        ├── debug@2.2.0 (ms@0.7.1)
remote:        ├── proxy-addr@1.0.10 (forwarded@0.1.0, ipaddr.js@1.0.5)
remote:        ├── send@0.13.0 (destroy@1.0.3, statuses@1.2.1, ms@0.7.1, mime@1.3.4, http-errors@1.3.1)
remote:        ├── serve-static@1.10.2 (escape-html@1.0.3, send@0.13.1)
remote:        ├── type-is@1.6.10 (media-typer@0.3.0, mime-types@2.1.9)
remote:        └── accepts@1.2.13 (negotiator@0.5.3, mime-types@2.1.9)
remote:
remote: -----> Caching build
remote:        Clearing previous node cache
remote:        Saving 2 cacheDirectories (default):
remote:        - node_modules
remote:        - bower_components (nothing to cache)
remote:
remote: -----> Build succeeded!
remote:        ├── ejs@2.3.3
remote:        └── express@4.13.3
remote:
remote: -----> Discovering process types
remote:        Procfile declares types -> web
remote:
remote: -----> Compressing...
remote:        Done: 10.2M
remote: -----> Launching...
remote:        Released v3
remote:        https://mktktmr-test-heroku-app.herokuapp.com/ deployed to Herok
remote:
remote: Verifying deploy... done.
To https://git.heroku.com/mktktmr-test-heroku-app.git
 * [new branch]      master -> master
App管理画面(push後)
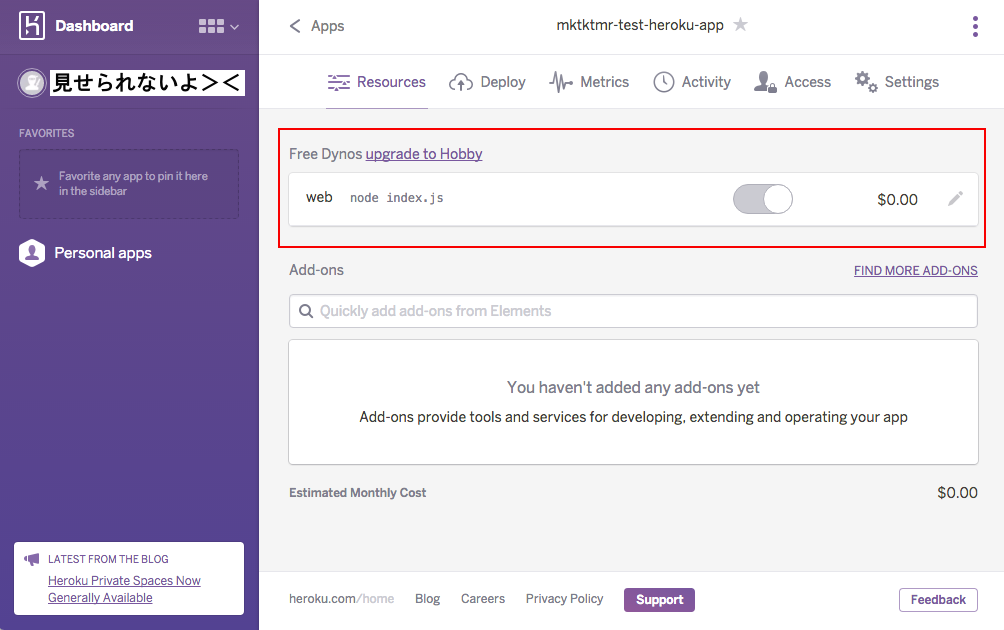
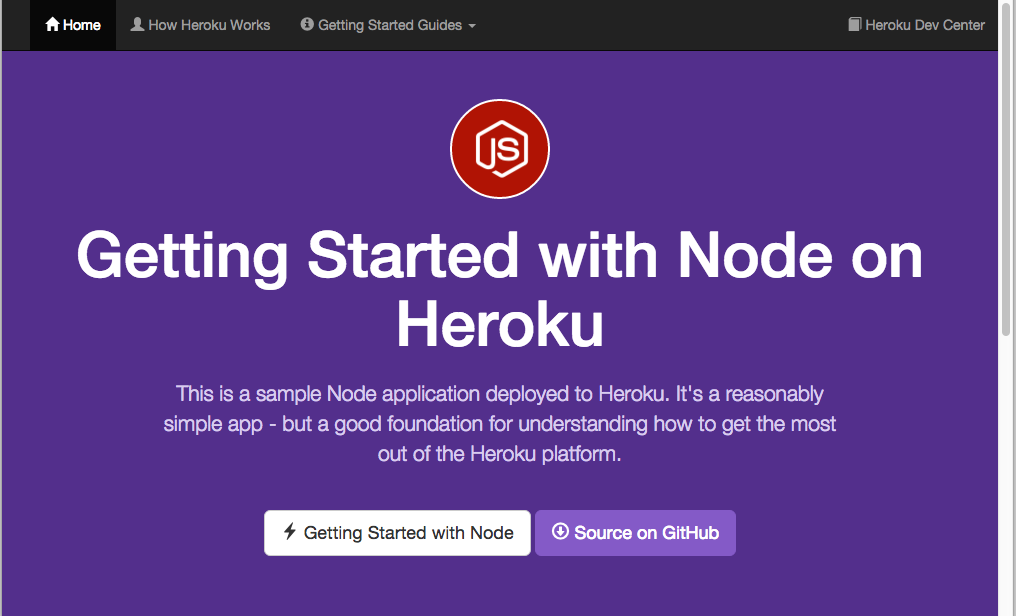
アプリにアクセスしてみる
アプリケーションを開く(Webブラウザが起動し、アプリのURLが開かれる)
$ heroku open
Opening mktktmr-test-heroku-app... done
$
その他
ロギング
「heroku logs --tail」を利用することでリモートでログ監視ができる
$ heroku logs --tail
2016-01-29T21:22:05.932126+00:00 heroku[api]: Enable Logplex by hoge@fuga.com
2016-01-29T21:22:05.932126+00:00 heroku[api]: Release v2 created by hoge@fuga.com
2016-01-29T21:26:17.536538+00:00 heroku[api]: Scale to web=1 by hoge@fuga.com
2016-01-29T21:26:17.607423+00:00 heroku[api]: Deploy 5e531fb by hoge@fuga.com
2016-01-29T21:26:17.607423+00:00 heroku[api]: Release v3 created by hoge@fuga.com
2016-01-29T21:26:17.921584+00:00 heroku[slug-compiler]: Slug compilation started
2016-01-29T21:26:17.921589+00:00 heroku[slug-compiler]: Slug compilation finished
2016-01-29T21:26:18.689167+00:00 heroku[web.1]: Starting process with command `node index.js`
2016-01-29T21:26:20.729829+00:00 app[web.1]: Node app is running on port 10971
2016-01-29T21:26:22.256715+00:00 heroku[web.1]: State changed from starting to up
2016-01-29T21:47:19.821604+00:00 heroku[router]: at=info method=GET path="/" host=mktktmr-test-heroku-app.herokuapp.com request_id=5c1440f8-8a27-4cfe-9b01-f9da5cbabbef fwd="106.161.123.219" dyno=web.1 connect=1ms service=36ms status=200 bytes=6119
Procfile
Process Types and the Procfile | Heroku Dev Center
アプリケーションが起動した時にすべきコマンドが定義されているファイル
$ ls -l
total 40
-rw-r--r--  1 makoto  staff    19  1 30 06:18 Procfile #こいつ
-rw-r--r--  1 makoto  staff  1371  1 30 06:18 README.md
-rw-r--r--  1 makoto  staff   300  1 30 06:18 app.json
-rw-r--r--  1 makoto  staff   460  1 30 06:18 index.js
-rw-r--r--  1 makoto  staff   486  1 30 06:18 package.json
drwxr-xr-x  5 makoto  staff   170  1 30 06:18 public
drwxr-xr-x  4 makoto  staff   136  1 30 06:18 views
$
#中身の確認
$ cat Procfile
web: node index.js
スケーリング
「heroku ps」でアプリがいくつのdynosで動いているか確認できる
$ heroku ps
=== web (Free): node index.js
web.1: up 2016/01/30 08:19:41 +0900 (~ 3m ago)
「heroku ps:scale」でスケーリング出来る
$ heroku ps:scale web=1
Scaling dynos... done, now running web at 1:Free.
$
#無料アカウントではスケールアップはできないけどもね
$ heroku ps:scale web=2
Scaling dynos... failed
 !    Cannot update to more than 1 Free size dynos per process type.
依存性の定義(Node.jsの場合)
- 依存性はpackage.jsonに定義する
- プロジェクトのルートディレクトリにpackage.jsonがあるとHerokuはそのプロジェクトがNode.jsプロジェクトだと認識する
- ローカルでアプリを実行したい場合、「npm install」で依存ライブラリをインストールする必要がある
$ heroku local web
forego | starting web.1 on port 5000
web.1  | module.js:327
web.1  |     at require (internal/module.js:12:17)
npm install実行
$ npm install
node-js-getting-started@0.1.5 ~/node-js-getting-started
├── ejs@2.3.3
└─┬ express@4.13.3
  ├─┬ accepts@1.2.13
  │ ├─┬ mime-types@2.1.9
  │ │ └── mime-db@1.21.0
  │ └── negotiator@0.5.3
  ├── array-flatten@1.1.1
  ├── content-disposition@0.5.0
  ├── content-type@1.0.1
  ├── cookie@0.1.3
  ├── cookie-signature@1.0.6
  ├─┬ debug@2.2.0
  │ └── ms@0.7.1
  ├── depd@1.0.1
  ├── escape-html@1.0.2
  ├── etag@1.7.0
  ├─┬ finalhandler@0.4.0
  │ └── unpipe@1.0.0
  ├── fresh@0.3.0
  ├── merge-descriptors@1.0.0
  ├── methods@1.1.2
  ├─┬ on-finished@2.3.0
  │ └── ee-first@1.1.1
  ├── parseurl@1.3.1
  ├── path-to-regexp@0.1.7
  ├─┬ proxy-addr@1.0.10
  │ ├── forwarded@0.1.0
  │ └── ipaddr.js@1.0.5
  ├── qs@4.0.0
  ├── range-parser@1.0.3
  ├─┬ send@0.13.0
  │ ├── destroy@1.0.3
  │ ├─┬ http-errors@1.3.1
  │ │ └── inherits@2.0.1
  │ ├── mime@1.3.4
  │ └── statuses@1.2.1
  ├─┬ serve-static@1.10.2
  │ ├── escape-html@1.0.3
  │ └─┬ send@0.13.1
  │   ├── depd@1.1.0
  │   └── destroy@1.0.4
  ├─┬ type-is@1.6.10
  │ └── media-typer@0.3.0
  ├── utils-merge@1.0.0
  └── vary@1.0.1
npm install後
$ heroku local web
forego | starting web.1 on port 5000
web.1  | Node app is running on port 5000
GitHub Flowについて
かなり雑なメモ
ワークフローのイメージ
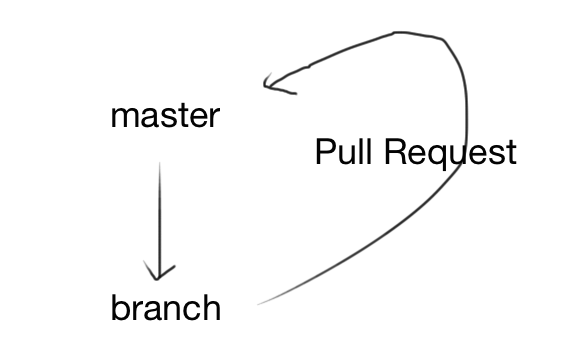
???
何が言いたいかというと、やたらフォークなどはせずにリポジトリは一つ、作業ごとにブランチ切ってそれをmasterブランチにmergeしようって事
概要
- masterブランチは常にデプロイ出来るように
- 作業単位でブランチを切る(作業の粒度は?)
- ブランチ名は作業内容がわかるように命名する
- submodules-init-task
- redis2-transition
- user-content-cache-key
... so on
- commitの粒度は細かく
- fix typoならそれだけcommit
- インデントの修正ならそれだけ修正
上記作業を一緒にcommitしてはダメです
- フィードバックやアドバイスを欲しい時もPullRequestする
- PRはmasterへのマージだけが目的ではない
- マージ後はすぐデプロイ
前提
- デプロイは自動化
- 手作業なんて時間の無駄
- オペレーションミス発生
- デプロイ中はロックするように
→ 開発スピードが上がると、デプロイする前に次のマージが発生するようになる
→ 不具合が発生した時に、どのデプロイが問題かがわからなくなる
- テスト重視
- テストコードがないものはmergeしない
- テストは自動化
参考資料
MeteorでSemantic UI始めました
メジャーなフレームワークっぽいけど、がっつりフロントエンドな人間ではないので、bizreachさんの勉強会に参加して初めてその存在を知りました。
「Semantic UI」
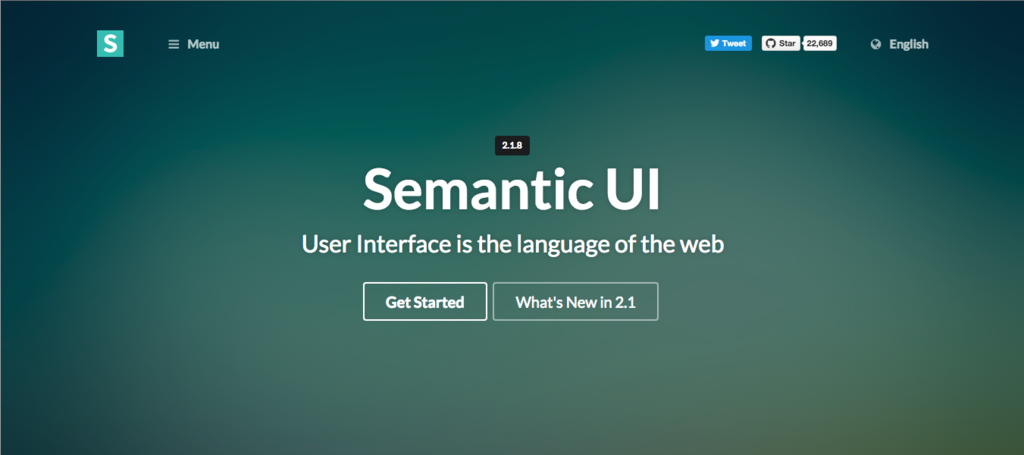
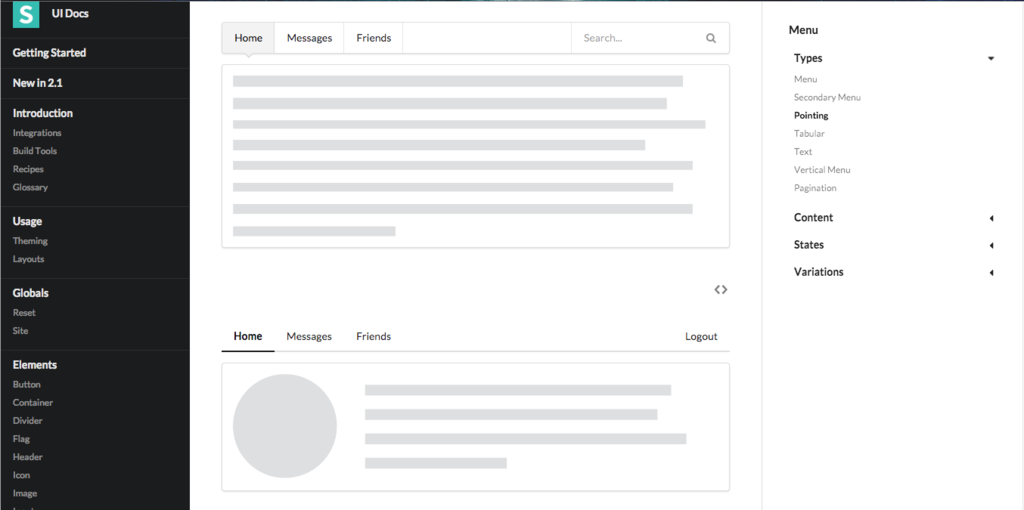
なにこれ超カッコいい(小並感)
さっそく触ってみることにするが、せっかくなんで先日勉強したMeteor上で使ってみる。
まずはMereorプロジェクトの作成
$ meteor create sample-semantic-ui
Created a new Meteor app in 'sample-semantic-ui'.

To run your new app:
  cd sample-semantic-ui
  meteor

If you are new to Meteor, try some of the learning resources here:
  https://www.meteor.com/learn

$ cd sample-semantic-ui
Semantic謹製Meteorパッケージがあるので、インストールする
The trusted source for JavaScript packages, Meteor resources and tools | Atmosphere
semantic:uiの他にも、LESSコンパイル時にベンダープレフィックスを追加してくれるless-autoprefixerとjqueryもインストールしておく
パッケージのインストール
$ meteor add semantic:ui flemay:less-autoprefixer jquery
jquery without a version constraint has already been added.

Changes to your project's package version selections:

flemay:less-autoprefixer  added, version 1.2.0
semantic:ui               added, version 2.1.7
semantic:ui-data          added, version 2.1.7


semantic:ui: Official Semantic UI Integration for Meteor
flemay:less-autoprefixer: The dynamic stylesheet language + Autoprefixer
$ cd sample-semantic-ui
「custom.semantic.json」の作成
client/lib/semantic-ui/custom.semantic.jsonが推奨構成らしいので、その通り作成する
$ mkdir -p client/lib/semantic-ui/
$ touch client/lib/semantic-ui/custom.semantic.json #※!空ファイルで
ディレクトリ/ファイル群の生成
「custom.semantic.json」を作った上でMeteorを起動すると。。。
$ meteor
[[[[[ ~/Documents/src/JavaScript/Meteor/sample-semantic-ui ]]]]]

=> Started proxy.
=> Started MongoDB.
=> Started your app.

=> App running at: http://localhost:3000/
=> Client modified -- refreshing
「custom.semantic.json」と同じ階層に以下のようなファイルやディレクトリが生成される
$ ls -la
total 40
drwxr-xr-x  10 makoto  staff   340  1 23 04:11 .
drwxr-xr-x   3 makoto  staff   102  1 23 04:02 ..
-rw-r--r--   1 makoto  staff  1518  1 23 04:11 .custom.semantic.json
-rw-r--r--   1 makoto  staff  1518  1 23 04:08 custom.semantic.json
drwxr-xr-x   8 makoto  staff   272  1 23 04:11 definitions
-rw-r--r--   1 makoto  staff  4052  1 23 04:11 semantic.less
drwxr-xr-x   7 makoto  staff   238  1 23 04:11 site
-rw-r--r--   1 makoto  staff  2561  1 23 04:11 theme.config.import.less
-rw-r--r--   1 makoto  staff  1654  1 23 04:11 theme.import.less
drwxr-xr-x   3 makoto  staff   102  1 23 04:11 themes
また、「custom.semantic.json」自身も更新されている
{
  "definitions": {
    "accordion": true,
    "ad": true,
    "api": true,
〜〜〜 中略 〜〜〜
    "table": true,
    "transition": true,
    "visibility": true,
    "visit": true
},
  "themes": {
    "amazon": false,
    "basic": false,
    "bookish": false,
〜〜〜 中略 〜〜〜
    "rtl": false,
    "striped": false,
    "timeline": false,
    "twitter": false
  }
}
ここまでで、SemanticUIのインストールは完了。
試しにHTMLにSemanticのスタイルを当ててみる
/sample-semantic-ui.html
<head>
<!-- 中略 -->
<template name="hello">
  <button class="ui primary button">Click Me</button> <!-- buttonタグにクラス追加 -->
  <p>You've pressed the button {{counter}} times.</p>
</template>
スタイル適用前

スタイル適用後

うん、OKね
CSSフレームワークはbootstarpしか使ったことなかったけど、個人的にSemanticUIのほうがクールだと思ったので、しばらく使ってみたいですね
【Sass】とりあえずインストール
環境
- OS: OS X 10.10.5
参考
1. rubyのインストール
Sassはrubyでコンパイルされるので、rubyのインストールが必要です。
が、Macの場合はrubyがプリインストールされてるので、特にすることはないです。
2. Sassのインストール
gemでインストールします
※gemって?
Rubyのrvmやgemってなんだ?て調べたらrbenvが出てきたの巻 - むかぁ~ どっと こむ
コンソール開いて、「gem install sass」と叩くだけ
$ gem install sass
Fetching: sass-3.4.21.gem (100%)
ERROR:  While executing gem ... (Gem::FilePermissionError)
    You don't have write permissions for the /Library/Ruby/Gems/2.0.0 directory.
$ sass -v
。。。と見せかけて、root権限必要でしたー
$ sudo gem install sas
Password:
$ sudo gem install sass
Password:
Fetching: sass-3.4.21.gem (100%)
Successfully installed sass-3.4.21
Parsing documentation for sass-3.4.21
Installing ri documentation for sass-3.4.21
1 gem installed
確認
$ sass -v
Sass 3.4.21 (Selective Steve)
おまけ. ちょっといじってみる
これだけだとあんまりなんで、少しSassをいじってみる。
細かいことは置いといて、公式のソースをコピペ。
input.scss
// 変数
$font-stack:    Helvetica, sans-serif;
$primary-color: #333;

body {
  font: 100% $font-stack;
  color: $primary-color;
}
SCSS記法の場合は、拡張子は「scss」なんですね。。。
sassだと思い込んでて、30秒くらいコンパイルエラーに悩まされました^^;
$ sass input.scss output.css
#確認
$ ls
input.scss  output.css  output.css.map
output.cssとoutput.css.mapが出力されました!
output.css.mapの方はソースファイルとのマッピング情報を持っているみたいです。
output.cssはこんな感じ
body {
  font: 100% Helvetica, sans-serif;
  color: #333; }

/*# sourceMappingURL=output.css.map */
ちなみに「sass --watch 監視対象ファイル(ディレクトリ)」 と叩くとファイルの変更を検知してコンパイルしてくれます
$ sass --watch input.scss:output.css #ファイルの場合、{ソースファイル:出力ファイル名}で出力ファイル名の指定ができる
>>> Sass is watching for changes. Press Ctrl-C to stop.
[Listen warning]:
  Listen will be polling for changes. Learn more at https://github.com/guard/listen#polling-fallback.
>>> Change detected to: input.scss
      write output.css
      write output.css.map